
First you need a Pattern! Take a pair of shorts that are a size you like.
Trace shorts on plain paper. Adding Length: Feel free to make them a little longer or shorter, depending on what you want to create.
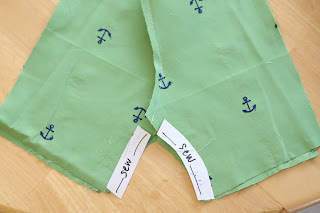
Fold fabric in half~ right sides facing each other.
Trace 2 sets of the pattern. So you will have 2 folded pieces of fabric.


Sew from the waist of the shorts down to the crotch. Repeat on other piece.
Unfold both pieces and put right sides together. You should now have the outline of your shorts in front of you.
Sew from the bottom of the crotch down to bottom of the shorts on both sides.
Then sew the outside of the shorts on both sides. The line from the waist all the way down.


You are getting close!
If you have a serger on your machine, serge the edges of your shorts. If this sounds foreign to you like it did to me not too long ago, you are trying to make the edges of your material cleaner. You can use a zig-zag stitch for this too. If this is your first pair of shorts and you choose not to do this, that's okay!


HEM: After zig-zagging or serging the bottom of your shorts, you are ready to hem. Try the shorts on your child to mark accurately where you will be hemming.
Once you have marked your hem.
With right sides still together, fold the bottom of the pants up to your mark.
Sew right under the zig-zag or serge.


Voila you just hemmed your shorts!
Moving right along...
Elastic Waist: Don't let this scare you. It's easier than you think. Choose Elastic that is at least a 1/2" wide up to an inch. Turn shorts right sides out.
Fold the top of the shorts over and sew all the way around, leaving a 1/2" section to pull your elastic through.
Measure your child's waist. My son has a 20" waist, so I am using 21" of elastic to leave myself enough sewing room.
Hook a safety pin at the end of the elastic.
Using safety pin, push the elastic through the space you left in the waist of the shorts. It's okay if fabric gathers. When you are done you will be able to pull the fabric to fix it.
Almost there! Sew the elastic together and the space closed.
Trim all your leftover thread inside and out.
Voila! Look what you've created!!!
Time to try them on!!!!


