
Tuesday, May 22, 2012

Wednesday, May 2, 2012
Bedtime Stories
What are some of the favorite bedtime stories in your house??
Here are some that we LOVE to read...

Friday, April 27, 2012
Car Seat Confessions
You're trying to keep the car on the road as you reach back to put the paci in baby's mouth, while your baby is screaming in their car seat and your two other children are in the "back, back" of the van starting to yell, because they are getting frustrated by the noise. Shoooooo, it makes me tense to even read that! Ever been there? It's my reality right now, and if I want to leave my house, I have to face it numerous times a day. My first son was colicky. I mean screamed 13 hours a day for the first 6 months, but at least we could stick him in the car seat and he would normally fall asleep. Not my 2nd and 3rd! Especially not my 3rd. She is 6 months old now and we are still trying to figure out soothing methods to get her to calm down. Most friends and family don't believe that Anna screams like she does in the car, until they take a ride with us! Holy Moly, she's got some lungs!
We aren't quite sure if we are just now figuring out some things that are helping her, or if she is just "working it out" with age.
 Tips and Tricks:
1. Baby Einstein Music and Melodies Mirror
Tips and Tricks:
1. Baby Einstein Music and Melodies Mirror
 You are supposed to put it on the back of the seat for baby to look at, but I have also tied it on to the car seat handle bar for her to play with it. Like so.
 I was willing to spend any amount of money if it would help the crying! I think this was $30 well spent. I love that I can put the music/lights on a timer. You can set it from 10-60 minutes.
This is an over all great buy!
Hope this helps soothe your crying car seat baby too!
I was willing to spend any amount of money if it would help the crying! I think this was $30 well spent. I love that I can put the music/lights on a timer. You can set it from 10-60 minutes.
This is an over all great buy!
Hope this helps soothe your crying car seat baby too!


Monday, April 23, 2012
Straw Bowls. Can't live without them!
When it comes to soup or cereal, my boy's can't live without these straw bowls and cups!
If you have a Publix near you, they retail for about a $1.50 a piece.
You can also get them from numerous other websites, including onestepahead. There you can pick up a 6 pack of bowls for 9.95.
Caution, they may cause an occasional bubble blowing contests ;-)


Medicine Dropper Water Color Paint
What to do with all of those old medicine droppers??? Water Color Paint!! Beautiful!!
Here's how to...
 1. Get some old, CLEAN medicine droppers!
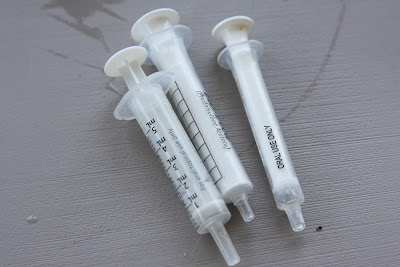 2. Get some glasses and food coloring!
 3. Paint Away!!
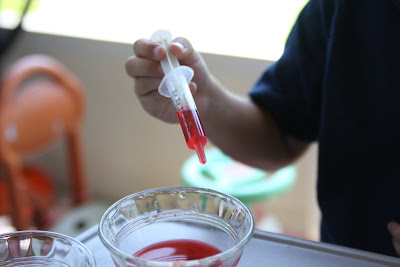
 TaDa!! Look what I made!


Friday, April 20, 2012
Top 5 Summer Essentials for Kids
1. Sunscreen Wipes (Supergoop! Sunscreen Swipes)
How amazing are these!!! Sunscreen Wipes...Awesome!
 2. Sprinkler Play! Can't get enough!! (Fisher Price)
 3. Travel Backpack/Art-table (GoVinci Backpack)
Why didn't I think of this?
3. Travel Backpack/Art-table (GoVinci Backpack)
Why didn't I think of this?
 4.Popsicle Molds. Must have.
 5.
Ice Cream Maker - Game!!
The Ice Cream Ball Play and Ice Cream Maker! How fun!
5.
Ice Cream Maker - Game!!
The Ice Cream Ball Play and Ice Cream Maker! How fun!


Wednesday, April 18, 2012
Bye Bye Swim Diapers
Bye bye swim diapers!! We know that Little Swimmers and all of the other swim diapers only hold the poo anyway, SO, why not buy the bathing suit with diaper already in it?? Genius!!!
Here is the latest in swimwear trends for babies still in diapers.
I love these, "I Play Baby Wear" Suits found at iplaybabywear.com
I'm seeing this for Anna in the future...

This is in the works for Luke!

Happy swimming!
In the mean time, share this with a mommy!!
Here is the latest in swimwear trends for babies still in diapers.
I love these, "I Play Baby Wear" Suits found at iplaybabywear.com
I'm seeing this for Anna in the future...

This is in the works for Luke!

Happy swimming!
In the mean time, share this with a mommy!!
Baby Poop Talk
Whether your baby has been strictly breastfed or not, you know that the changes in your baby's poo can at times be a little freaky to say the least. Anna is 6 months old now so we've already been through a variety of stool types, ranging from, black to green, to seedy and buttered popcorn smelling! The latest is one that I DO NOT remember seeing in either of my son's poo, when they started solids! You'd think by child number 3, I would know all about poo. So anyway, Anna Banana (very fitting nickname) started with oatmeal a couple weeks ago, once and day and gradually went up to a couple of times a day. No big changes in the poo there.
Just a couple of days ago however, I started mixing some mashed bananas in her oatmeal and boy was I in for a surprise a few days later! I start to change her very full diaper (as she hadn't pooped in a few days, because bananas can be constipating in some babies) and I had a JAW DROPPING moment! "What are these black worms doing in my baby's poo?" After a triple take, and a double check that the black "worms" weren't moving, I quickly ran to my computer!
I found out that I wasn't the only mom googling this! Yes, strange though it may seem, eating bananas can lead to the appearance of worm or thread like things in your baby's poop!
Shooooo! No call to the doctor this time! If you want a picture of this, it's up to you to do the searching, unless you have already seen this firsthand!
In the mean time, please share this with another mommy!
Just a couple of days ago however, I started mixing some mashed bananas in her oatmeal and boy was I in for a surprise a few days later! I start to change her very full diaper (as she hadn't pooped in a few days, because bananas can be constipating in some babies) and I had a JAW DROPPING moment! "What are these black worms doing in my baby's poo?" After a triple take, and a double check that the black "worms" weren't moving, I quickly ran to my computer!
I found out that I wasn't the only mom googling this! Yes, strange though it may seem, eating bananas can lead to the appearance of worm or thread like things in your baby's poop!
Shooooo! No call to the doctor this time! If you want a picture of this, it's up to you to do the searching, unless you have already seen this firsthand!
In the mean time, please share this with another mommy!
Friday, February 10, 2012
How to get pen out of Suede 1 -2-3
Uh Oh!! My 3 year old marked up my rocking chair with pen. YES, I did give him a pen, however, I also gave him a notepad to write on. No less than two minutes later, I hear some major scribbling and come to find that it is on my rocking chair, not the notepad! AHHH!!!
So, how do I get pen out of suede??? I was willing to try anything.
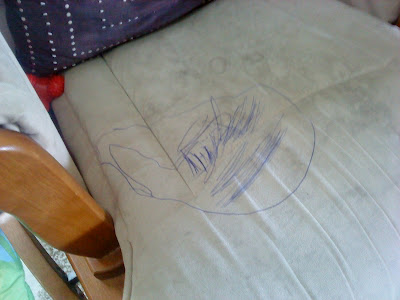
First: Get a clean towel and pour vinegar on it. Dab the stained area.
Second: Spray the area with Windex and dab again.
Third: Get another clean towel and pour rubbing alcohol on it. Rub the stained area until stain disappears.

Amazing! It's like new again!!!
So, how do I get pen out of suede??? I was willing to try anything.

First: Get a clean towel and pour vinegar on it. Dab the stained area.
Second: Spray the area with Windex and dab again.
Third: Get another clean towel and pour rubbing alcohol on it. Rub the stained area until stain disappears.

Amazing! It's like new again!!!
Wednesday, September 14, 2011
Not Your Ordinary Foam Pumpkin
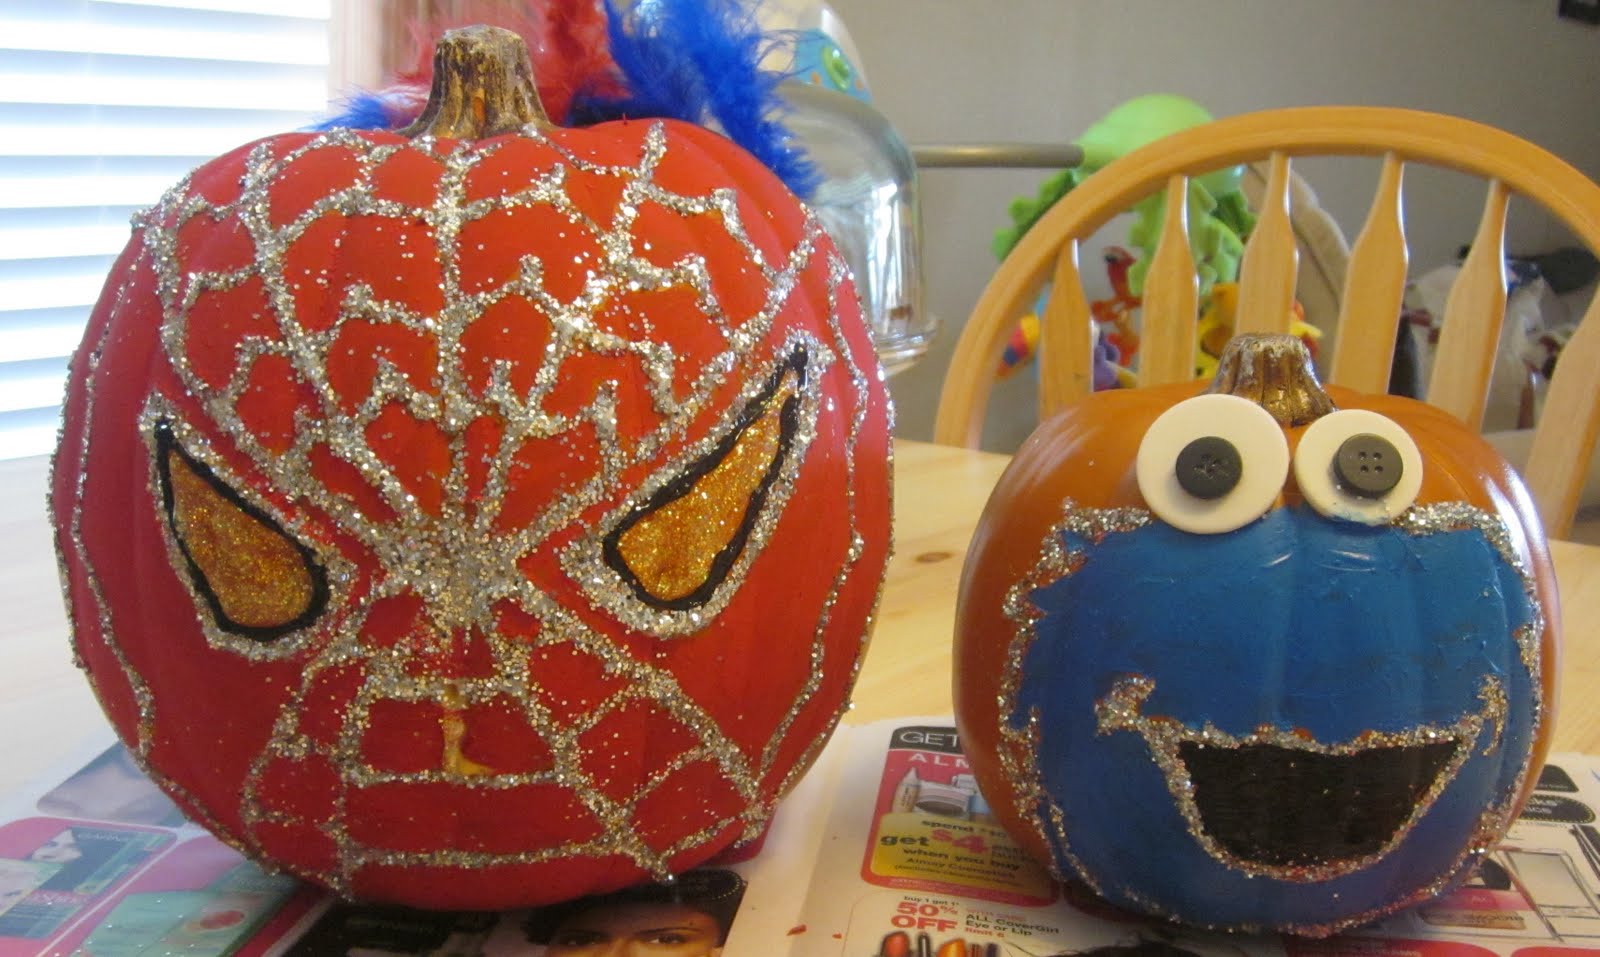
The boys have finally decided what they want to be for Halloween! In an effort to fit in a few "Fall" crafts before baby 3 makes his or her appearance, we decided to decorate foam pumpkins to match the boys costumes.
The boys thought this was so much fun!!!
Their favorite part was shaking the glitter on the glue, tapping it off and watching the design of the glue appear. They clapped and laughed!
SO, take an "ordinary" foam pumpkin and turn it into your unique creation.
Here are some other ideas too! Happy decorating!!!!


The boys thought this was so much fun!!!
Their favorite part was shaking the glitter on the glue, tapping it off and watching the design of the glue appear. They clapped and laughed!
SO, take an "ordinary" foam pumpkin and turn it into your unique creation.
Here are some other ideas too! Happy decorating!!!!



Tuesday, July 26, 2011
BUCS Pillowcase Dress and Bow Tie Shirt


Pillowcase Dresses are a must have for Summer! Check out this dress and bow tie shirt made for a friend's little girl and boy.
These are super easy to make!! Check out the below site for exact instructions.
http://bumblebeelinens.com/pillowcaseDress.php
Wednesday, July 6, 2011
No Sew Fabric Flower Onesie

Back in June I did a tutorial on how to make a "No sew fabric flower". (For that tutorial, simply click on June and go to "no sew fabric flower".)
Well I decided to spice things up a little and turn a plain onesie into a fabulous one!


You may know that I am pregnant and due in about 3 months. Well, we do not know what we are having, but I will be bringing this to the hospital just in case it's a girl. I also made a matching headband. This is such an easy thing to make. Make one for a shower or baby gift!
Kids Floor Pillow - Shabby to Spiderman Cool


So, about a year ago I bought these big ugly rectangular pillows at Ross for $10 a piece. I knew I wanted to recover them, and FINALLY did!
These pillows are "semi-homemade" seeing as though I did not make the full pillow. You could make your pillow very easily though. Check this "e" site out. You can follow the directions and make it the size you'd like. http://www.ehow.com/video_4433955_sew-pillow.html
Back to our pillow:
The pillows I bought had a blue corduroy and a soft light blue side. I decided to keep the blue corduroy side. So, first I spread out the spiderman fabric over the light blue side of the pillow and cut out a piece, leaving a couple of inches around the perimeter of the pillow.
Next, I folded the fabric to the edge of the pillow and pinned around the whole pillow.
Lastly, I simply did a whip-stitch (this is by hand) all the way around the pillow.

If you are not familiar with a whip-stitch, check out this video of how to do one.
http://www.ehow.com/video_4940669_sew-whip-stitch.html

Friday, July 1, 2011
Paint, Paint, Paint!


A new painting for a newly created bedspread!
I just recently picked out this particular "Michael Miller" fabric for a new bedspread to inspire a new boys room. We are taking them from the animal theme to the transportation theme! Cars, trucks, airplanes, fire trucks, bikes and more!
I picked out the airplane in the fabric and drew a larger one on the canvas. I then painted the whole plane blue and added the yellow windows and surrounding flares. I recommend when you are first getting started to lightly draw with pencil your basic outline. Then, the options are endless! So, do you want to go paint something now??
Wednesday, June 8, 2011
Tutorial: Perfect Summer Shorts!
Today we are starting with elastic waist shorts. These are SO easy to make! Perfect for the new sewer! You can choose any type of fabric for these shorts. You can also replicate this idea if you are wanting to make pajama pants, long pants or a girls skirt.


First you need a Pattern! Take a pair of shorts that are a size you like.
Trace shorts on plain paper. Adding Length: Feel free to make them a little longer or shorter, depending on what you want to create.
Fold fabric in half~ right sides facing each other.
Trace 2 sets of the pattern. So you will have 2 folded pieces of fabric.


Sew from the waist of the shorts down to the crotch. Repeat on other piece.
Unfold both pieces and put right sides together. You should now have the outline of your shorts in front of you.
Sew from the bottom of the crotch down to bottom of the shorts on both sides.
Then sew the outside of the shorts on both sides. The line from the waist all the way down.

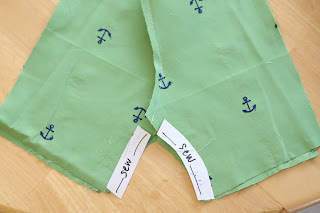

You are getting close!
If you have a serger on your machine, serge the edges of your shorts. If this sounds foreign to you like it did to me not too long ago, you are trying to make the edges of your material cleaner. You can use a zig-zag stitch for this too. If this is your first pair of shorts and you choose not to do this, that's okay!


HEM: After zig-zagging or serging the bottom of your shorts, you are ready to hem. Try the shorts on your child to mark accurately where you will be hemming.
Once you have marked your hem.
With right sides still together, fold the bottom of the pants up to your mark.
Sew right under the zig-zag or serge.


Voila you just hemmed your shorts!
Moving right along...
Elastic Waist: Don't let this scare you. It's easier than you think. Choose Elastic that is at least a 1/2" wide up to an inch. Turn shorts right sides out.
Fold the top of the shorts over and sew all the way around, leaving a 1/2" section to pull your elastic through.
Measure your child's waist. My son has a 20" waist, so I am using 21" of elastic to leave myself enough sewing room.
Hook a safety pin at the end of the elastic.
Using safety pin, push the elastic through the space you left in the waist of the shorts. It's okay if fabric gathers. When you are done you will be able to pull the fabric to fix it.
Almost there! Sew the elastic together and the space closed.
Trim all your leftover thread inside and out.
Voila! Look what you've created!!!
Time to try them on!!!!


First you need a Pattern! Take a pair of shorts that are a size you like.
Trace shorts on plain paper. Adding Length: Feel free to make them a little longer or shorter, depending on what you want to create.
Fold fabric in half~ right sides facing each other.
Trace 2 sets of the pattern. So you will have 2 folded pieces of fabric.


Sew from the waist of the shorts down to the crotch. Repeat on other piece.
Unfold both pieces and put right sides together. You should now have the outline of your shorts in front of you.
Sew from the bottom of the crotch down to bottom of the shorts on both sides.
Then sew the outside of the shorts on both sides. The line from the waist all the way down.


You are getting close!
If you have a serger on your machine, serge the edges of your shorts. If this sounds foreign to you like it did to me not too long ago, you are trying to make the edges of your material cleaner. You can use a zig-zag stitch for this too. If this is your first pair of shorts and you choose not to do this, that's okay!


HEM: After zig-zagging or serging the bottom of your shorts, you are ready to hem. Try the shorts on your child to mark accurately where you will be hemming.
Once you have marked your hem.
With right sides still together, fold the bottom of the pants up to your mark.
Sew right under the zig-zag or serge.


Voila you just hemmed your shorts!
Moving right along...
Elastic Waist: Don't let this scare you. It's easier than you think. Choose Elastic that is at least a 1/2" wide up to an inch. Turn shorts right sides out.
Fold the top of the shorts over and sew all the way around, leaving a 1/2" section to pull your elastic through.
Measure your child's waist. My son has a 20" waist, so I am using 21" of elastic to leave myself enough sewing room.
Hook a safety pin at the end of the elastic.
Using safety pin, push the elastic through the space you left in the waist of the shorts. It's okay if fabric gathers. When you are done you will be able to pull the fabric to fix it.
Almost there! Sew the elastic together and the space closed.
Trim all your leftover thread inside and out.
Voila! Look what you've created!!!
Time to try them on!!!!


Subscribe to:
Posts (Atom)